Sunday, July 30, 2017

CARROT KHEER/ CARROT PAYASAM

This is a Colourful and simple  dessert, very easy to prepare. A healthy kheer, done using carrot, badam and cashew, which everyone will like, especially Children. This can be served warm or chilled.


INGREDIENTS:
Carrot - 2 
Cashewnuts  - 10
Badam - 6
Saffron/Kesar - a pinch
Sugar - 5 to 6 tsp
Milk - 1 1/2 cup
Cardamom - a pinch
Ghee - 2 tsp

METHOD:
1. Peel and grate carrot using a grater or grind coarsely in a mixer. Soak the badam for an hour before starting to prepare the recipe.
2. Heat ghee, add half of the cashews broken into pieces and fry till golden brown and keep aside.

3. In the same pan, add carrot and stir well until raw smell goes off.
4. Add milk, saffron/kesar and bring to boil in medium flame and allow the carrot to get half cooked in the milk.
5. Meanwhile, peel badam, add to a mixer along with remaining cashews and make a paste adding little water and add to the carrot, milk mixture.

6. After some time, the kheer will thicken and the carrot will be fully cooked.
7. Add sugar and cardamom and mix well. Taste for sugar and add more if needed.
8. After the sugar gets dissolved, add roasted cashews and switch off the flame.
9. Tasty and delicious Carrot Kheer is ready to be served.


See for Carrot Halwa in this blog

Note:
  • Add sugar according to the need as some carrots might be very sweet.
  • If the kheer becomes very sweet, add boiled and cooled milk so that the taste of sugar can be balanced.

Friday, July 28, 2017

PANEER MASALA DOSAI

Masala dosai is one of the popular South Indian breakfast recipe. Masala stuffing is usually prepared using potato. Here, I have done using Paneer, which is simple and easy to prepare. If we have paneer in our house, this recipe can be done in quick time. We always serve dosa with either chutney varieties or sambhar. For a change, this Paneer stuffing can be tried once in a while. This recipe is somewhat similar to Paneer Bhurji which has been already posted in this blog.


INGREDIENTS:
Paneer (crumbled) - 200g
Cumin - 1/2 tsp
Tomato - 2
Onion - 2
Red chilly powder - 1 tsp
Turmeric powder - 1/4 tsp
Coriander powder - 1/2 tsp
Crushed Ginger and garlic - 1 tsp
Coriander leaves - a handful
Salt
Oil - 3 tsp 

METHOD: 
PREPARING PANEER STUFFING:
1. In a tawa, heat oil and add cumin. 
2. Add chopped onion and cook for a while, add crushed ginger and garlic, cook well until raw smell goes off and add finely chopped tomato.

3. Stir well until the tomato turns juicy.
4. Add red chilly powder, turmeric powder, coriander powder, required salt and for a few minutes.
5. Sprinkle little water so that the raw smell goes off and becomes thick together.
6. At this stage, add crumbled paneer, chopped coriander leaves and stir for a minute and switch off the flame.
7. Paneer stuffing is ready now. 
 

PREPARING PANEER MASALA DOSAI:
1. Heat a dosa tawa, smear little oil.
2. If using idly batter, add little water and mix well so that the dosa can be easily spread.
3. Spread the dosa thin so that there is no need to turn to other side to get cooked.

4. Close with a lid and cook on medium flame.
5. Sprinkle some oil and wait until the dosa is well cooked with browning.
6. Spread the paneer and fold the dosa.
7. Paneer can be either spread in the centre and folded on both sides or spread at one side and folded with the other side as shown. 
8. Tasty and delicious Paneer Masala dosai is ready.


Note:
  • Paneer should be brought to room temperature before cooking so that crumbling will be easy.
  • Home made paneer will suit very well for this recipe since we don't need to crumble. Paneer can be prepared a day before and stored in fridge.
  • Over cooking of paneer will result in rubbery texture. So, switch off the flame immediately after adding paneer.


Wednesday, July 26, 2017

LADY"S FINGER RAITHA

This is one of the easiest recipe that can be done in minutes. We usually prepare raitha using onion, cucumber, carrot etc. But for a change I tried with lady's finger. It tasted well and will be an apt side dish for meals, chappathi, naan and for any variety rice.


INGREDIENTS:
Lady"s finger - 150 gms
Curd - 1 cup 
Chat masala powder -1/2 tsp
Salt - as desired


For Seasoning
Mustard - 1/4 tsp
Cumin - 1/4 tsp
Urad dhal - 1/2 tsp
Green chilly - 2
Asafoetida - a pinch
Coriander leaves - little
Curry leaves - a leaflet
oil - 1 tsp

METHOD: 
1. Wash lady's finger thoroughly and chop into small pieces and keep aside.

2. In a bowl, add curd,chat masala powder, salt and mix well.

3. In a pan, heat oil, add the items given under seasoning one by one.

4. Add chopped lady's finger and cook well on low flame. Add a pinch of salt to fasten the cooking.
5.The lady's finger will shrink in size and get little darkened. Add curry leaves and chopped coriander leaves, mix well and switch of the flame.
6. After it cools completely, transfer to the bowl with curd and mix well.
7. Tasty Lady's finger Raitha is ready.


Note:
  • A pinch of turmeric can be added while seasoning to enhance colour.
  • The curd should be thick to give a better taste.


Tuesday, July 25, 2017

WHEAT PAROTTA (Home style)

Parotta is layered flat white bread, a South Indian special, mainly Kerala. Parotta is usually done in Maida/all purpose flour. The rubbery texture of maida helps to stretch the dough well and layers are formed. Here, I have done mixing wheat flour and maida in equal quantity. It came out very well with less layers. We feel heavy when we eat parotta using maida flour. But, when mixed with wheat flour, the heaviness was not felt. 


INGREDIENTS:
Wheat flour - 1 cup
Maida - 1 cup
Sugar - 1 tsp
Salt
Oil - as required

METHOD:
1. In a bowl, add wheat flour and maida, Sugar along with required salt and mix well.
2. Add 3 to 4 tsp of oil and mix well, add needed water and  make  a soft dough. Let it rest for an hour.
3. Make medium size doughs and keep aside.

4. Take a dough and stretch as big as it can be stretched, apply some oil and smear well on whole surface of the stretch and dust little flour.
5. Using fingers, make as many pleats as possible and fold it stretching as much as possible.
6. Roll it again to make a dough as shown. Seal the end properly by pressing gently.

7. Dust some flour, take a rolled dough, using a rolling pin gently spread the dough.
8. Heat a tawa, place the spread dough, cook well on both sides in medium flame.
9. Sprinkle some oil, when brown spots appear remove it.

10. After it has cooled a bit, crush gently with hands for the layers to appear.
11. Tasty Parotta is ready to be served with Kuruma or any side dish of choice.


See for Veg Kurma, Vegetable kohlapuri sabji in this blog


Note:
  • For preparing Restaurant style parotta, use maida flour only. More oil should be used to get layers. 
  • Sugar can be dissolved in little water or can be powdered and added to the flour.


Monday, July 24, 2017

PIDI KARNA KIZHANGU FRY / YAM FRY (another vareity of YAM)

Pidi Karna Kizhangu is also comes under YAM/ KARNA KIZHANGU family. Satti Karnai is the other variety. Click here for YAM ROAST  recipe. To avoid the itchiness, I used an  iron-opener (bottle-opener), while cooking.

PIDI KARNA KIZHANGU FRY


INGREDIENTS:-
Pidi Karna kizhangu - 250 gms
Garlic pods - 7 to 10 pods.
Curry leaves - 2 leaflet, chopped
Oil - 4 tsp
Mustard seeds - 1/2 tsp
Cumin seeds - 1/2 tsp
Fennel seeds - 1/2 tsp
Asafoetida - 1/4 tsp
Sambhar powder - 1 & 1/2 tsp
Garam Masala - 1/2 tsp
Rice Flour - 1/2 tsp
Salt - to taste

METHOD:-

(1) Boil water in  a pressure cooker ( I used 3 ltr cooker), add crystal salt, pidi karna kizhangu, and bottle-opener,  for 2 whistles in high flame. Allow the pressure to release by itself.


(2) When the pressure is released completely, strain the water from the cooker and remove the skin of the veggie.


(3) Now, Cut into to thick round shapes. Don't cut too thin.


(4) Heat oil in a Kadai/pan, add the mustard seeds. Allow it to splutter. Then add cumin seeds, fennel seeds, Curry leaves, Mashed Garlic pods and saute for a minute.


(5)  Then add Asafoetida, Sambhar powder, Garam masala and rice flour. And saute in low flame for a minute. Be cautious, the powders may get burnt.


(6)  Now add the sliced veggie to this masala and toss, so that the masalas gets coated in all the veggies. Check for salt. Add if needed. Cover with a lid of plate and let it cook for 10 minutes.


(7)  After the specified time, gently flip the other side of the veggie. Cover with lid and let it cook in low flame for 5 minutes.


(8) Pidi Karna Kizhangu is ready to be served....


YAM ROAST

Yam/ Karunaikizhangu is a very good root vegetable compared to other root vegetables. It is not used regularly due to its itchy effect. There are methods to avoid it. Washing the chopped yam in water which was used to soak  rice/ boiling in water with little tamarind/ cooking in an iron tawa/pan can reduce the itchy effect.


INGREDIENTS:
Yam - 200g
Turmeric powder-  1/4 tsp
Sambhar powder-  1/4tsp
Rice flour - 2 tsp
Asafoetida - 1/4 tsp
Tamarind - a little
Salt
Oil - as needed

METHOD:
1. Clean the Yam after chopping the muddy parts and cut into small,  thin  rectangular/ square pieces.

2. Boil water, add turmeric, tamarind and yam pieces and cook till it is half done.
3. Drain the water completely, spread in a bowl, add Sambhar powder, salt and rice flour and mix thoroughly without breaking into pieces.
4. Heat a dosa tawa, sprinkle some oil, place 5 or 6  pieces at a time and cook on medium flame.

5. After one side  is cooked, flip to the other side using a ladle/spoon, sprinkle little oil.
6. Reduce the flame to low after both sides are cooked and allow sometime so that it becomes crispy.
7. Cook all the pieces the same way.
8. Crispy and tasty Yam roast is ready.

NOTE:
  • I have used iron dosa tawa so that the itchy effect might be reduced.
  • Shallow/Deep frying can also be done.


Friday, July 21, 2017

CAPSICUM GRAVY

This gravy  can be prepared the same way we prepare Paneer gravy varieties and Vegetable kuruma. Here we use only Capsicum instead of other items. The basic preparation is the same as other gravy recipes.

PANEER PARATHA WITH CAPSICUM GRAVY

INGREDIENTS:
Capsicum - 1
Onion - 1
Red chilly powder - 1 tsp
Garam masala - 1/2 tsp
Coriander leaves - a handful
Kasuri methi/dried fenugreek leaves - a little
Salt
Oil/ghee - 2 tsp

To Grind
Tomato - 2
Coriander seeds - 1 tsp
Ginger chopped - 1 tsp
Garlic -4
Poppy seeds - 1/2 tsp
Fennel - 1 tsp
Cloves - 2
Cinnamon - 1
Cashewnut - 5
Badam - 5
Coconut - 1/4 cup grated

METHOD:
1. Soak all the ingredients given to grind for an hour and grind to paste. Badam and cashew may be soaked for even more time.
2. In a tawa, heat oil/ghee and add chopped onions and saute for a while.
3. Add red chilly powder, garam masala and cook till raw smell goes off. 
4. Add the paste and cook on low flame. When it is half cooked add chopped Capsicum and required salt and stir well and close with a lid.

5. Add water and adjust to gravy consistency. Even the mixer jar used to make the paste can be run with little water and added so that the left over in the jar can be used and not wasted.
6. After the gravy is cooked well, taste for spice and salt and add little if needed.
7. Add chopped coriander leaves and crushed kasuri methi and mix well, switch off the flame.
8. Tasty Capsicum Gravy is ready to served with Chappathi/ paratha, naan, rice, roti, fried rice etc.


Note:
  • Green chilly can be used instead of red chilly powder.
  • A teaspoon of curd can be added after switching off the flame to enhance taste.


Thursday, July 20, 2017

AVOCADO SALAD


AVOCADO SALAD with CHAPPATHI


Avocado is also called as Butter fruit in India.

Avocados, a rich source of carotenoids ( helps to protect against eye disease), are packed with disease-fighting antioxidants. It also helps to get more nutrients from other foods.

Avocados contain Oleic acid (which is present in Olive Oil), a fat that activates the part of your brain that makes you feel full, thereby helps in reducing weight.
The oleic acid in avocados helps to reduce cholesterol levels.

Half an avocado contains 3.4 grams of fibre, including soluble and insoluble.

It slows down digestion and helps keep blood sugar from spiking after a meal.

A diet high in good fats may even help reverse insulin resistance, which translates to steadier blood sugar long-term.

One cup of avocado provides almost a quarter of your recommended daily intake of folate, a vitamin which cuts the risk of birth defects. If you’re pregnant-or planning to be-avocados will help protect your unborn baby.

Avocados are very high in potassium, which supports healthy blood pressure levels.

A high folate intake is also associated with a lower risk of heart attacks and heart disease.

Let us see how to prepare this easy and quick salad. Always use Ripe Avocados for Salads.


INGREDIENTS:-
Avocado - 1 no.
Tomato - 1/2
Chopped coriander leaves - 2 tsp
Lime juice - 1/2 lime
Black pepper powder - 1/2 tsp
Salt - as per taste
Onion - 1/2 (optional)


METHOD:-
Cut avocado in cubes.
Follow the steps to cut the avocado.
First, Cut into 2 halves. (Avocado's seed size is big)


Remove / Scoop the seed by using spoon.


Using Knife gently cut in vertical lines.


Now, cut in horizontal lines.


By Scooping the inner part using a spoon, the outer skin will be removed, and store it in a bowl.
(Edible part is inner part)


Similarly do the same process for the other half too.

Chop tomatoes and coriander leaves and add to the avocado. Finely chop Onions and add to it.  Mix gently.


Add Black pepper powder, salt and lime juice and toss gently, so that the powders gets coated with the salad.


Healthy Avocado salad is ready.

Serve Avocado salad with Chappati, Bread....

DATES CAKE


DATES  CAKE


I tried this receipe using dates as sweetner. It does not contain ghee/butter. sugar.


INGREDIENTS:-

Wheat flour - 1/4 cup
Milk - 1/4 cup
Deseeded Dates - 10 nos.
Fruit salt - 1/2 tsp
Water - as required


METHOD:-


Soak the dates in 1/4 cup of lukewarm water for 10 minutes. Strain the dates and set aside. Don't throw the water, we can use this water for grinding the paste/batter.

Heat a aluminum kadai or cooker with separator and lid,  on high flame for 10 minutes.

(If using pressure cooker, do not use gasket and whistle-weight)

Grease a plate with little ghee and set aside.

In a mixer jar, add dates, wheat flour. Grind to paste by adding the milk and water used for soaking dates.

Pour the batter in a bowl. Now add the fruit salt and a 1/2 teaspoon of batter. Mix gently.

Pour this batter into the greased plate and tap twice to set it evenly.

Uncover the Kadai/ Pressure cooker, place this plate and cover with lid. Bake for 30 minutes in low/sim flame. 

After the specified time,  by inserting a tooth pick or knife, check whether the cake is baked or not.

Allow the cake to cool completely....

Cut into desired shapes and serve...

Click here for step-by-step baking process in Protein-wheat cake.


PORICHA KUZHAMBU

This kuzhambu is prepared slightly different way than usual kuzhambu which done using toor dhal. In this recipe, we add coconut & rice flour paste along with other ingredients. Tastes well with rice & Ghee, also suitable for Idly & dosa. I have used capsicum. Any vegetable of choice  can be used for preparing this recipe.


INGREDIENTS:
Toor dhal - 1/2 cup
Capsicum/any vegetable - 1 cup
Tomato  - 1
Turmeric - 1/4 tsp
Tamarind - gooseberry size
Sambhar powder - 2 tsp
Salt

To grind
Coconut  - 1/4 cup
Rice flour- 1 tsp
Or
Raw rice (soaked) - 1 tsp

FOR SEASONING
Mustard - 1/4 tsp
Cumin - 1/4 tsp
Fenugreek-  1/4 tsp
Small onion/ shallots - 6
Asafoetida - a pinch
Curry leaves - A leaflet
Oil - 2 tsp

METHOD:
1. Pressure cook toor Dhal along with turmeric and keep aside.
2. Soak tamarind in warm water and extract juice.
3. Prepare coconut paste along with rice flour/ raw rice.
4. In a tawa, add little oil, chopped capsicum & tomato and cook for a while. Add Sambhar powder along with tamarind juice and cook until raw smell goes off.
5. Add toor dhal, required salt & cook for few minutes.
6. Add the paste and cook for a minute and switch off the flame and close with a lid.
7. In a pan, heat remaining oil, add mustard & cumin.
8. After it splutters, add fenugreek along with chopped small onion and cook till nice aroma comes out.
6. Add curry leaves & asafoetida and pour over the Sambhar.
7. Tasty Poricha Kuzhambu is ready.

Note:
  • Vegetables like lady's finger, pumpkin, drumstick, brinjal, yam  can be used.
  • The quantity of toor dhal can be reduced since the Sambhar will become  thick after adding paste.


Wednesday, July 19, 2017

Muslim Style Vegetable Briyani, Using Pressure Cooker

MUSLIM STYLE VEGETABLE BRIYANI


This is a weekend special receipe. Usually Briyanis are prepared using basmati rice. But i tried using seeraga sambha rice, which contains good nutritive value when compared to basmati rice.


I used Pressure Cooker to make the cooking process simple. Always use big, wide-shaped pressure cooker/ or pressure pan, instead of samll, narrow-shaped cooker.


INGREDIENTS:-

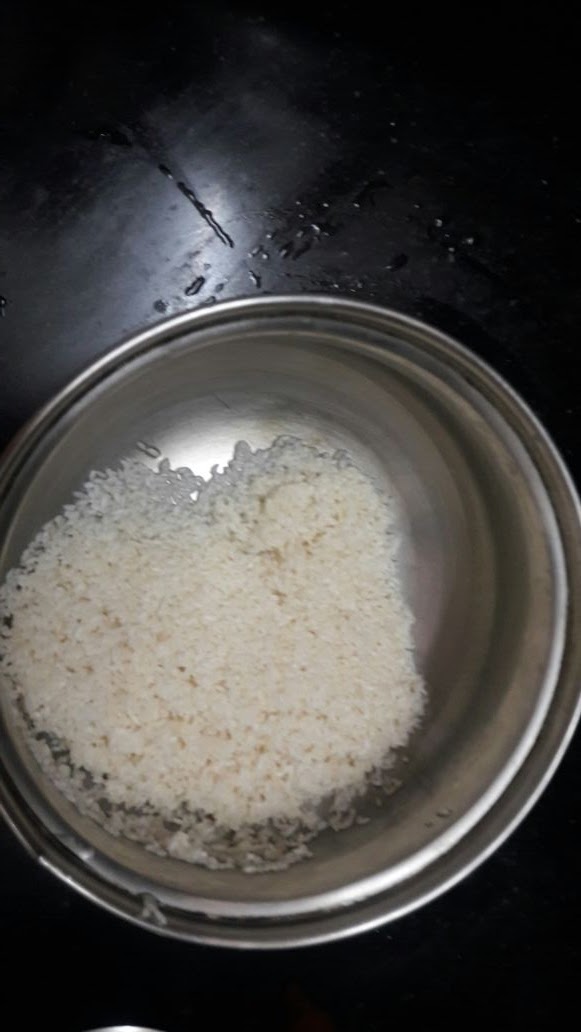
Seeraga Samba Rice - 1 cup
Water - 2 cups
Pudhina leaves / Mint leaves and Coriander leaves together - 1 handful
Mixed Vegetables - 2 to 3 cups ( your choice of vegetables)
( like Carrot, french beans, potato, green peas, Chow-chow, cauli-flower)
Sliced Onion - 1
Tomato Chopped - 1
Curd - 4 tablespoon
Red chilly Powder - 1 tsp
Turmeric Powder - 1/4 tsp
Garam Masala Powder - 3/4 tsp
Lime - 1/2 piece


To Grind :-

Green chilly - 2 nos
Ginger - 1/2 inch
Garlic - 8 to 10 pods


Spices For Seasoning:-

Ghee / Oil - 4 tablespoon ( 50 ml)
Cinnamon - 2 inches
Cardamon - 1 no.
Jathi pathri - 1 no.
Cloves - 4 nos.
Bay leaf - 2 nos
Cashews - 10 to 12 nos


METHOD:-

(1)  Wash and soak the seeraga sambha rice for 25 minutes. (Make sure That the soaking time doesnot exceeds 25 minutes).


(2)  Cut the vegetables into medium sized shapes.  Chop the coriander leaves and mint leaves.


(3)  Grind the ingredients, in a mixer jar, adding little water, since the ingredients are in less amount and set aside.

(4)  Heat Ghee/oil in a cooker and add Cashews to golden brown colour. Restore the fried cashews in a cup . This, we will use for garnishing.

(5)  In the same Oil/ Ghee add the spices one by one and saute in low flame. Cooking spices in low flame, adds more aroma to the briyani. Continue cooking in medium flame, (that is the flame should touch the base of the cooker)

(6)  Add the grinded paste and saute till the moists are absorbed. Add sliced Onions, required salt and cook till Onions turns transculent.


(7)  Add the coriander leaves and mint leaves and saute for a minute. 


(8)  Add the Red chilly Powder, Turmeric Powder, Garam Masala, mix well and saute for a minute.


(9)  Now add Chopped tomatoes. Cook till the tomatoes turn mushy. Add all the vegetables and mix well, so that all the vegetables gets coated with masalas. Keep it in low flame and cover with a lid/plate. Cook for 3 minutes. Add curd. Mix together.


(10)  Add 2 cups of water to this vegetable mixture and allow it to boil. Check for salt. (Secret tip:- while boiling, the water should taste a bit salty).

(11) Now strain the water (which is used for soaking),  and add the rice to the boiling water. Add lime juice.


(12)  Cover the cooker with lid-with-gasket. And cook in low/sim flame for 15 minutes. No need to put weight for whitle.

(13)  After 15 minutes, Put the weight and cook for 5 minutes in low flame. Switch off the flame. Allow the pressure to release.


(14)  When the pressure releases completely, open the pressure cooker and gently fluff the briyani using fork. It helps, to get individual strings of rice.


Garnish with fried cashews.

Serve Muslim Style Vegetable Briyani with Onion Raitha....

Briyani, tastes better, when it completly cools down.

NOTE:-


  • Use the same cup for measuring water and rice. For 1 cup of Seeraga Samba Rice, 2 cups of water is used.
  • In case, if Basmati Rice is used, 1and 3/4 th cup of water is to be added. 
  • Soaking Time - 20 minutes and Cooking in sim/low flame is  15 minutes, without weight. 
  • No need to cook by putting weight, in case of basmati rice..


Ads by Google

Ads by Google